|
1.
The Story So Far...
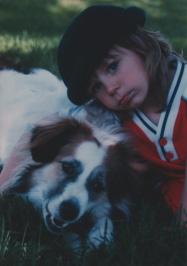
In steps 1 & 2 of my serialized tutorial I corrected the brightness and contrast on my dark image via the Levels and Curves Commands.
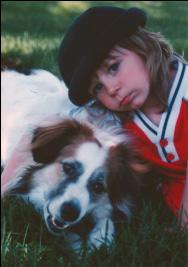
Next, in Step 3 & 4, I used the Image: Adjust: Color Balance... and the Image: Adjust: Hue/Saturation... commands to make color changes to the image. You can see how my lame-o scan has become a pretty vibrant image.
Remember, my image is actually 5" x 7" and 300ppi. I eventually want to print this on high quality photo paper, so during this tutorial and the next, we're going to take care of some imperfections in the image that you can't notice on the small example to the left. First, I'm going to rid my image of the myriad of little specks of dust and fibers on my picture. |
 |
2.
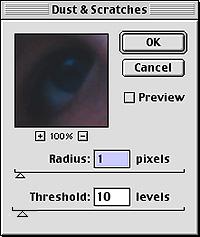
Filter: Noise: Dust & Scratches... is made precisely for this job. It only takes a couple of seconds and does a good job of getting rid of dust and scratches in your image. It works a lot like a blur filter, and so tiny elements, such as a hair or fiber, are lost when pixels are blurred together. Let's analyze the dialog box.
Radius: determines how far the filter searches for differences among pixels. You can move the Radius slider left or right, or enter a number in the text box The range is 1 to 16 pixels. Higher numbers make your image more blurry so use the smallest value that eliminates the imperfections.
Threshold: determines how different the pixels' values should be before they are eliminated. You want a higher number here, so you preserve more differences in you pixels so increase the threshold gradually by dragging the slider to the highest value possible that eliminates defects. |
|
|

 |
3.
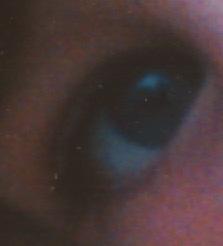
This is a spot on the boy's cheek. In the above example, you can see most notably a few pixels of very light yellow that don't belong. Below, you see the same area after Dust & Scratches... was applied. You can see that the filter does indeed blur your image but it's not too bad a trade off. In a bit, I'll bring back some of the detail and reduce the blur. |
 |
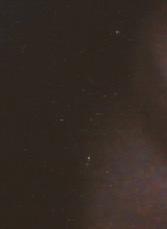
4.
Here's another example of places in my image that were contaminated with speck of dust. This stuff was all over. In my next tutorial in this series, I'll tackle the areas that Dust & Scratches... couldn't help by airbrushing and cloning, but trying to retouch out every one of these would be a nightmare. |

|
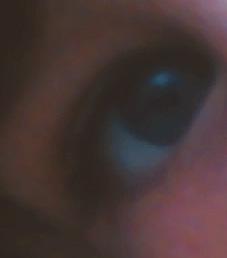
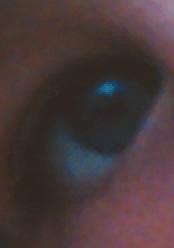
5.
The image to the left is how the boy's eye area looked after Dust & Scratches... did it's work. Let's make a comparison. I mentioned that using Dust & Scratches... is sort of like blurring you image so what about using a blur filter instead? I'll use Filter: Blur: Gaussian Blur... to find out. The blur filters can be used to soften the edges of a selection or an entire area. They blend and average neighboring pixels, resulting in a blurred effect.
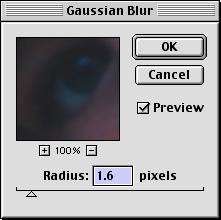
If you do any blurring, Gaussian Blur... is your best bet. Unlike the other Blur filters you have control over how much blurring is done. Usually, you want to use the least amount possible to achieve the desired effect.
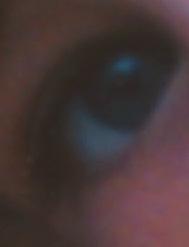
Notice the Radius: Slider just like in the Dust & Scratches... filter above. The higher a number you enter, the larger radius of pixels will be blended into one another. The smallest number I could get away with was 1.6. Any smaller, and my specks of dust still showed. The image at bottom left shows what Gaussian Blur... did to the dusty area in question.
The Verdict: Gaussian Blur... did a comparable job, but just looks a little too blurry to make it a viable option. The Threshold: slider lets Dust & Scratches... win our grudge match by retaining more detail. |
 |
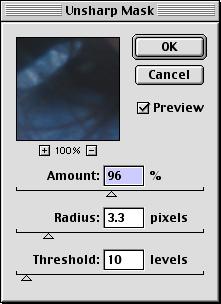
6.
Time to get rid of some of that blur in the image. Unsharp Mask, located in the Filter menu in the Sharpen sub-menu, is the one to use if you have any sharpening to do. As with Gaussian Blur..., you have maximum control over how much of the effect gets done to your image. There's three sliders here to play with. You want to sharpen the image as much as possible without going too far. Keep your eyes on the edges of things that have a lot of contrast with their background. If the edges start to look unnatural, back off those sliders, man! |
|
7.
Well, that was a quick and painless step wasn't it? After Dust & Scratches... has been applied, the image looks the same at it's shrunken 72ppi size. But we can all be assured that positive changes have been made.
Next I'm going to brush and clone out some of the larger imperfections in my photo. Don't bail out on me now. |
